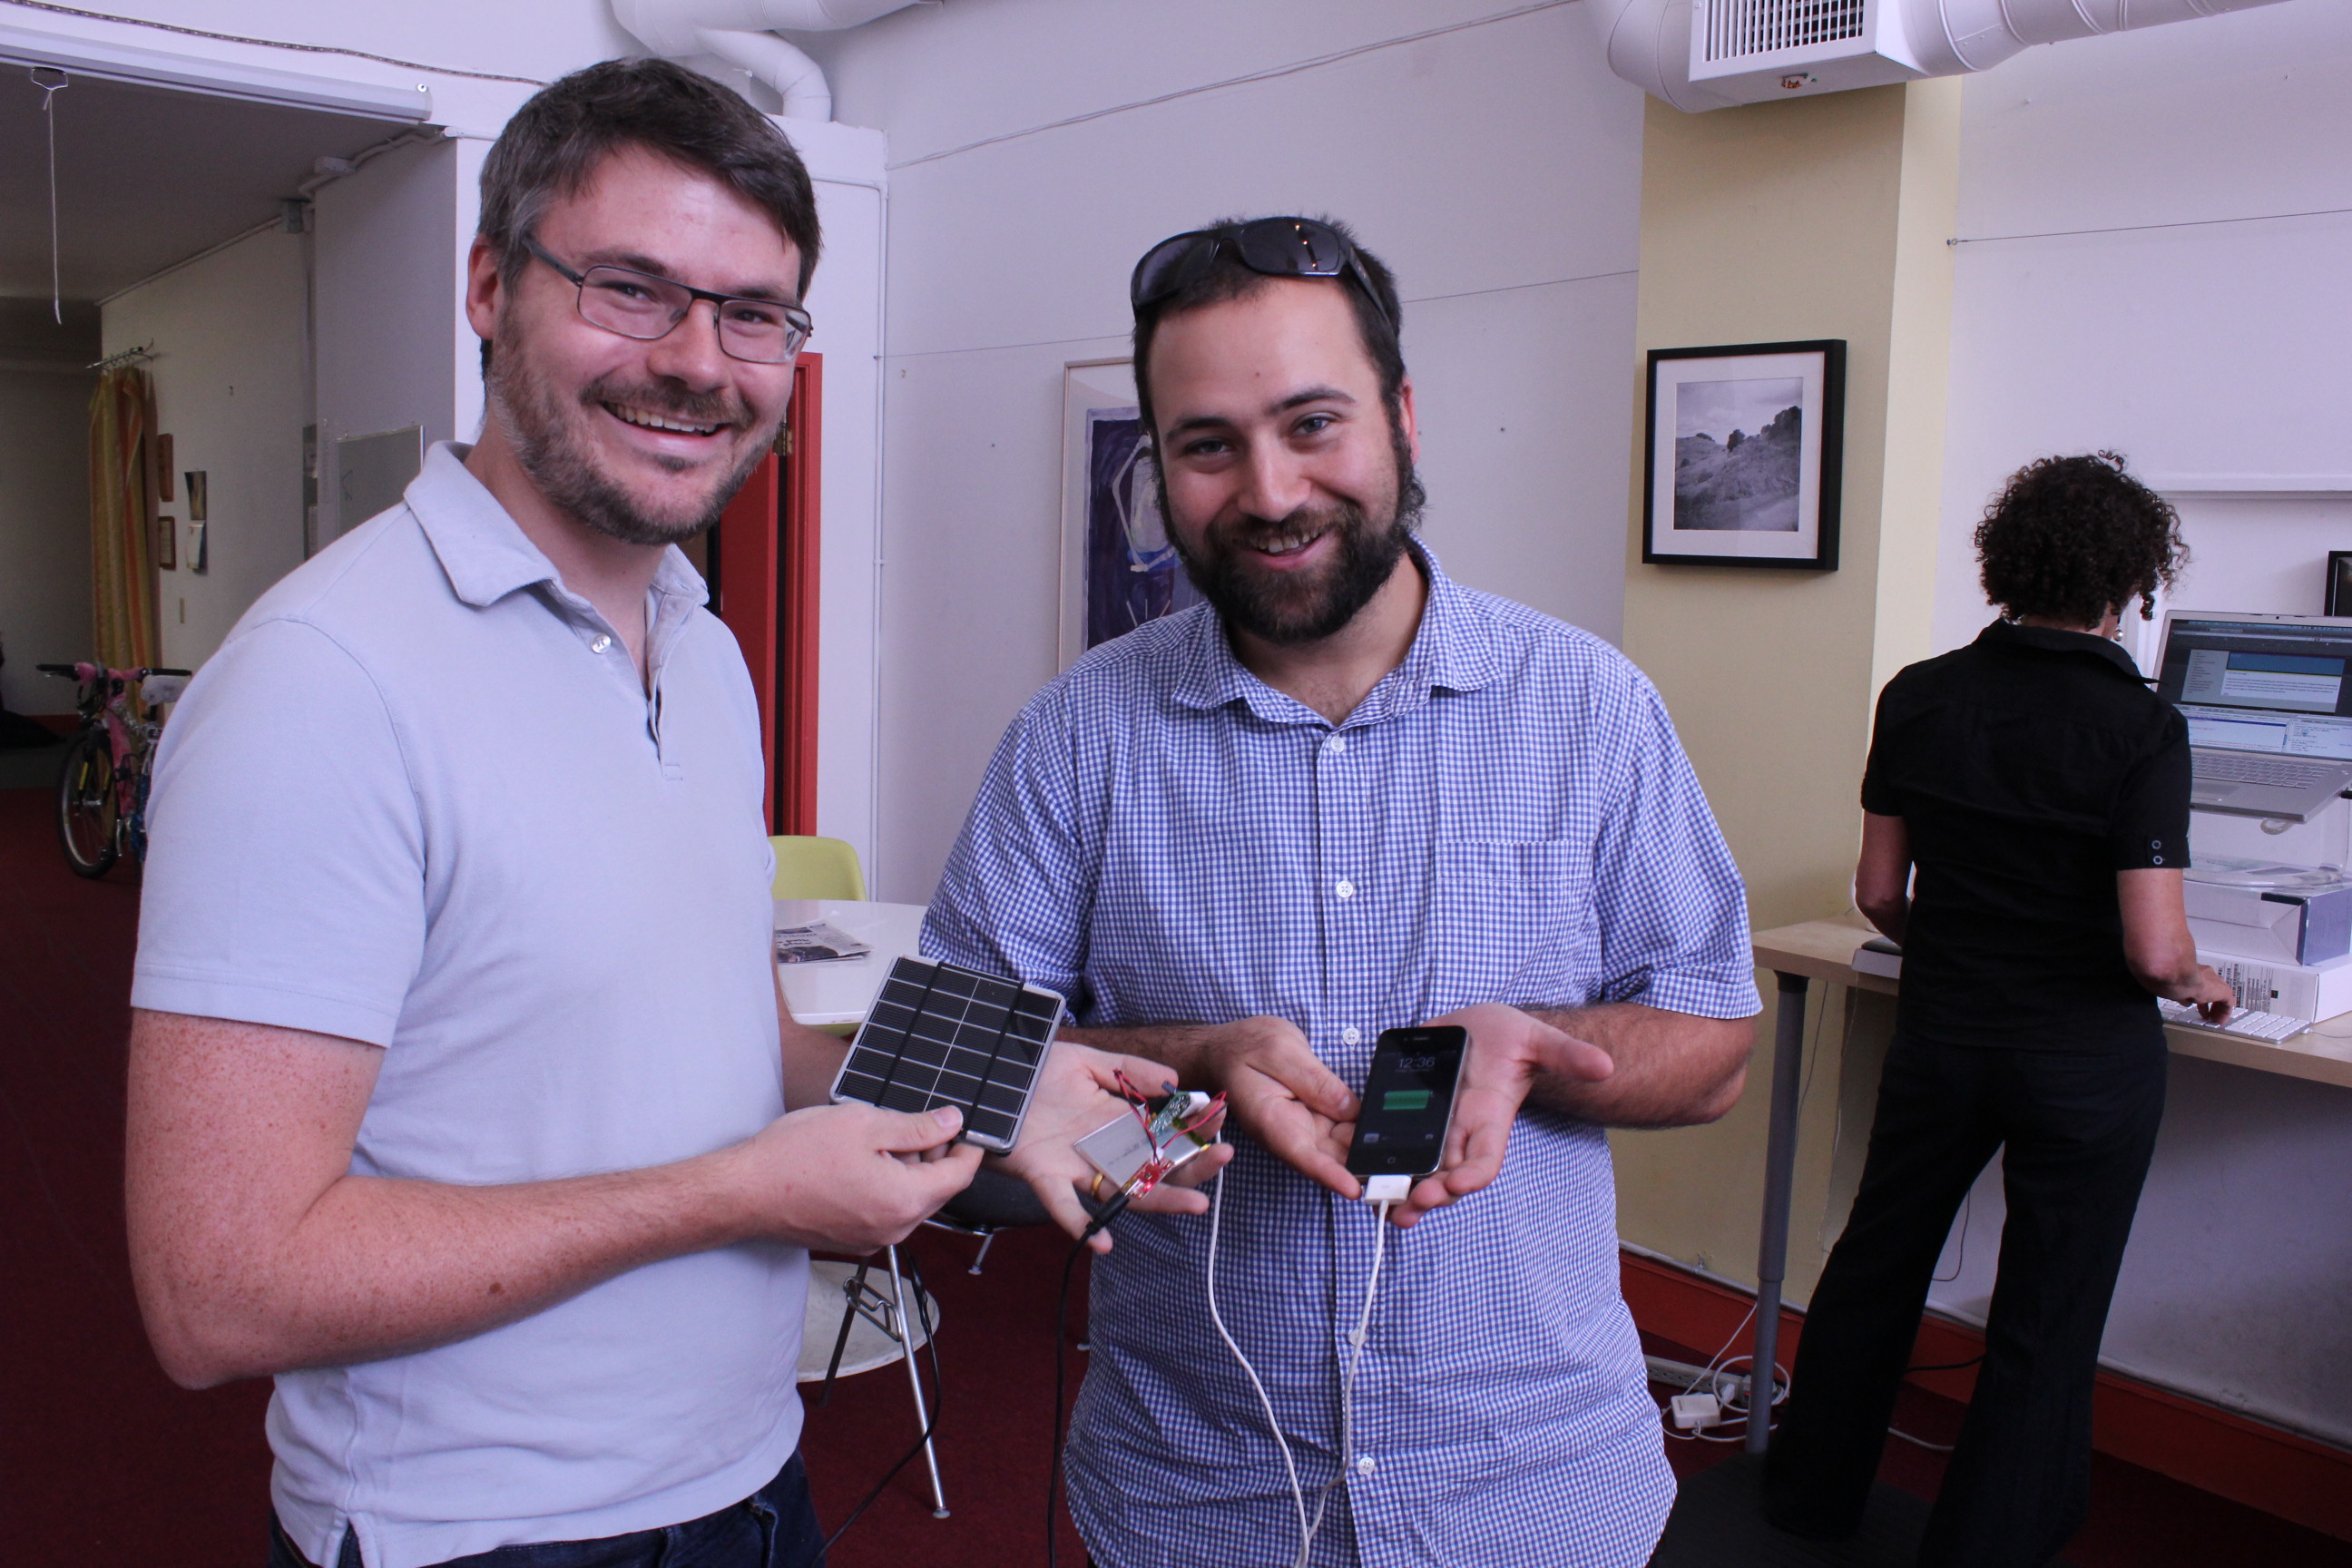
As a "maker" n00b, I can’t express how awesome it is to build a homemade solar-powered iPhone charger. The little 2W solar panel currently sits in the window of my west-facing home office (more on that later). Now, every afternoon, as the sun starts blazing onto my desk, I soak up a little power.
I know probably hundreds (or maybe thousands) of people have built similar chargers before. After all, 20,000 people attended the first San Francisco Maker Faire in 2006, and it's only grown since. Nationwide, there are tens or hundreds of thousands of makers out there. But there are probably plenty more would-be DIYers who are intrigued but haven't yet taken the plunge. I’m here to tell those people that for just $90 in parts and three hours of time, you too can keep your iPhone going, wherever you go. Seriously.
1% inspiration: Getting started
I know what you're thinking. Sure, I could just get an official Apple charger for $30. Maybe there's a third-party option for less. And yes, I could throw down $80 for a Mophie Juicepack to meet my external battery desires. But where's the fun or satisfaction in any of that?
Until last week, I was one of those people who admired the craftsmanship involved in many DIY projects, but thought that they were a bit too involved for me. I've always felt that wordsmithing—rather than electrosmithing—is my best skill. I mean, sure, I've swapped some RAM on my own computer before, but nothing that involved a heat gun and melting metal! But you really don't need any background to start. It only takes an idea.
I'd been holding mine for awhile. A few years ago, I met Drake Martinet (now of NowThisNews) for lunch in Oakland. The area often gets called the "sunny side" of the San Francisco Bay, and Martinet came sporting a bag with a flexible solar panel cut into the top flap. He said he used it to charge his phone while out and about.
I loved the idea. He keeps his phone charged and doesn't have to think about it. My phone constantly runs low. I pretty much have to carry a charger with me when I'm on the run. If I get really power-conscious, I go into no-Internet/no-GPS mode. If I'm really desperate—here comes Airplane Mode, turning it off again just to quickly send/receive text messages.
Ever since I saw Martinet's, I couldn't shake the thought. How cool would it be to have a similar setup?
Enlisting help and assembling the pieces
Earlier this summer, I mentioned this idea to my friend Malcolm Knapp, an electrical engineer here in Berkeley. Malcolm didn’t think it would be terribly difficult. A few Google searches proved him correct. Not only was it not difficult, but back in 2009, someone already put together a nice Instructables page outlining each step. To boot, it has a cutesy name: the MightyMintyBoost. Crucially, the page includes a shopping list (crucially, because, I didn't find the instructions Martinet gave me until well after completing this project).
Of course, Instructables or a knowledgeable friend aren't the only places to get started. Websites like HackADay and magazines like Make offer great resources, too. So why did I eventually keep Malcolm involved? Mostly, I wanted his expertise for two reasons: first, to make sure I didn’t do any serious damage to myself or the electronics. And second, well, I don’t own a soldering iron. As the assistant organizer of MakeSF, Malcolm couldn’t have been a better teacher. And when we sought equipment help through the folks at Tech Liminal (an Oakland co-working space), we had a great place to do it.
Soldering 101
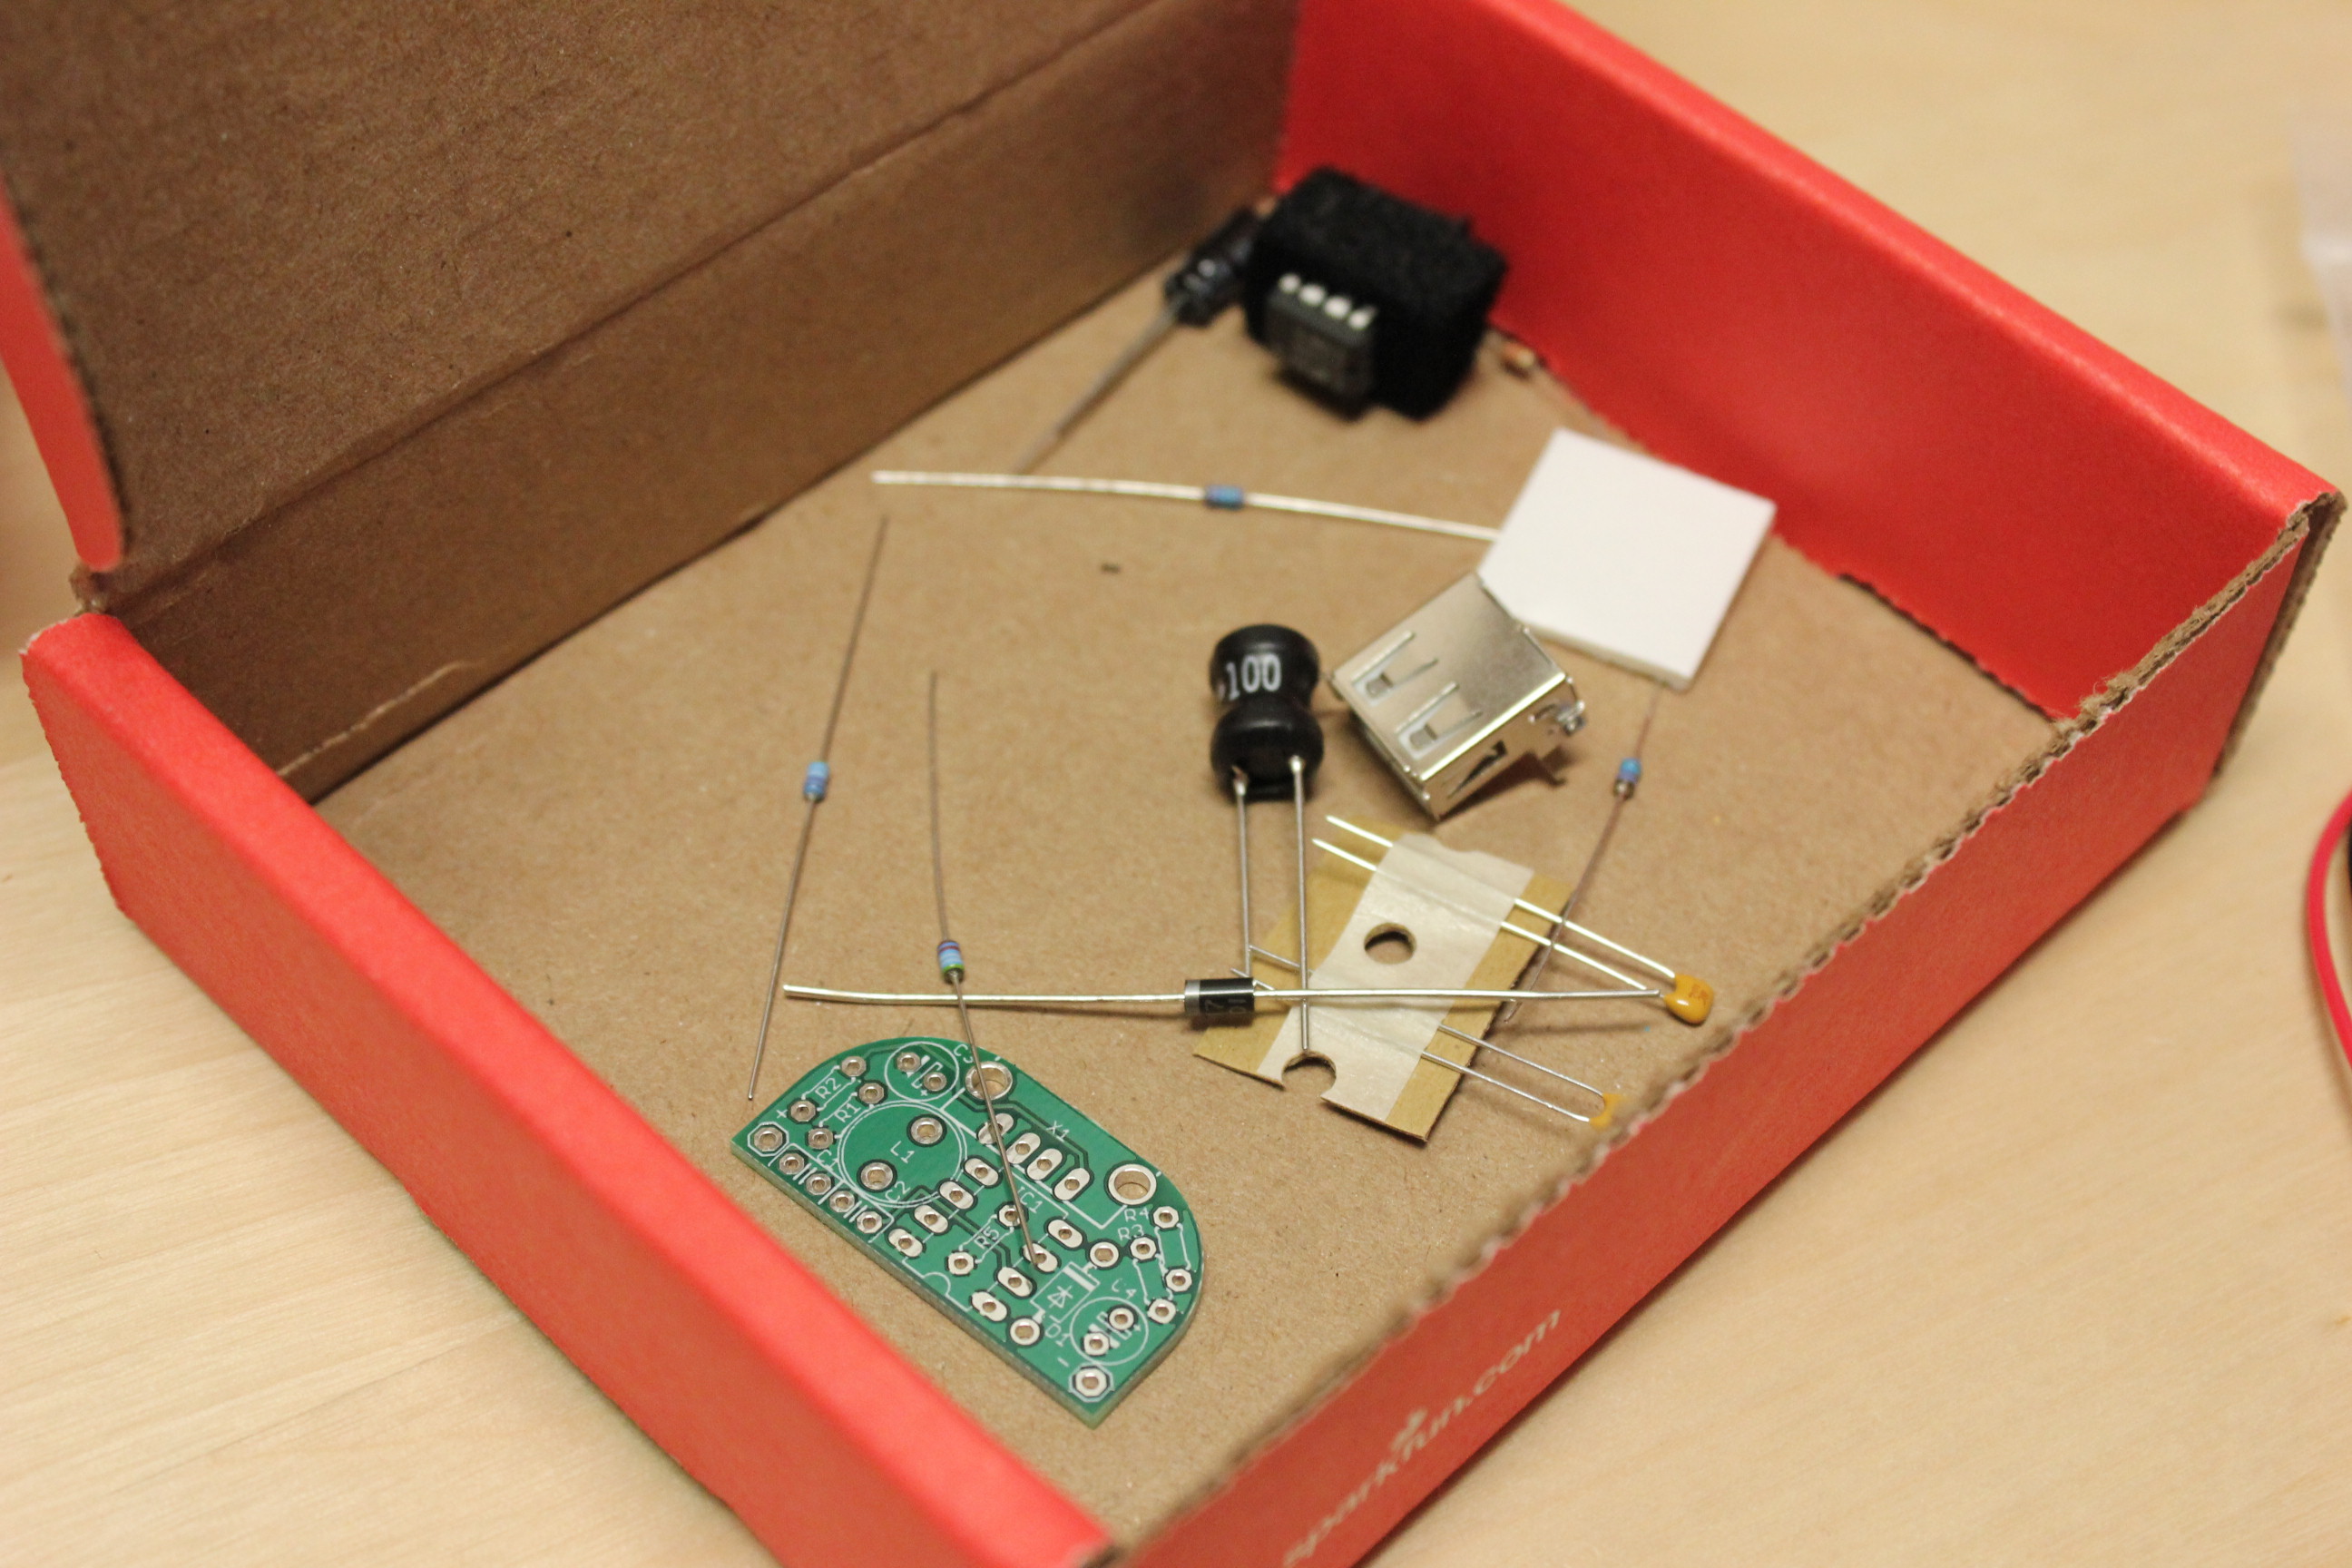
After waiting for all the parts to show up at my door (and for Malcolm to get back from his honeymoon), we finally sat down last week to do this together. Here’s what we started with (taxes and shipping included, and we also had to sacrifice a Micro USB cable that was kicking around):
2.0 Watt, 6 Volt Solar Panel—$29, Voltaic Systems
MintyBoost—$23, Adafruit
Cable/LiPoly charger/battery—$36, Sparkfun
Altoid tin—$3.70, your corner liquor store
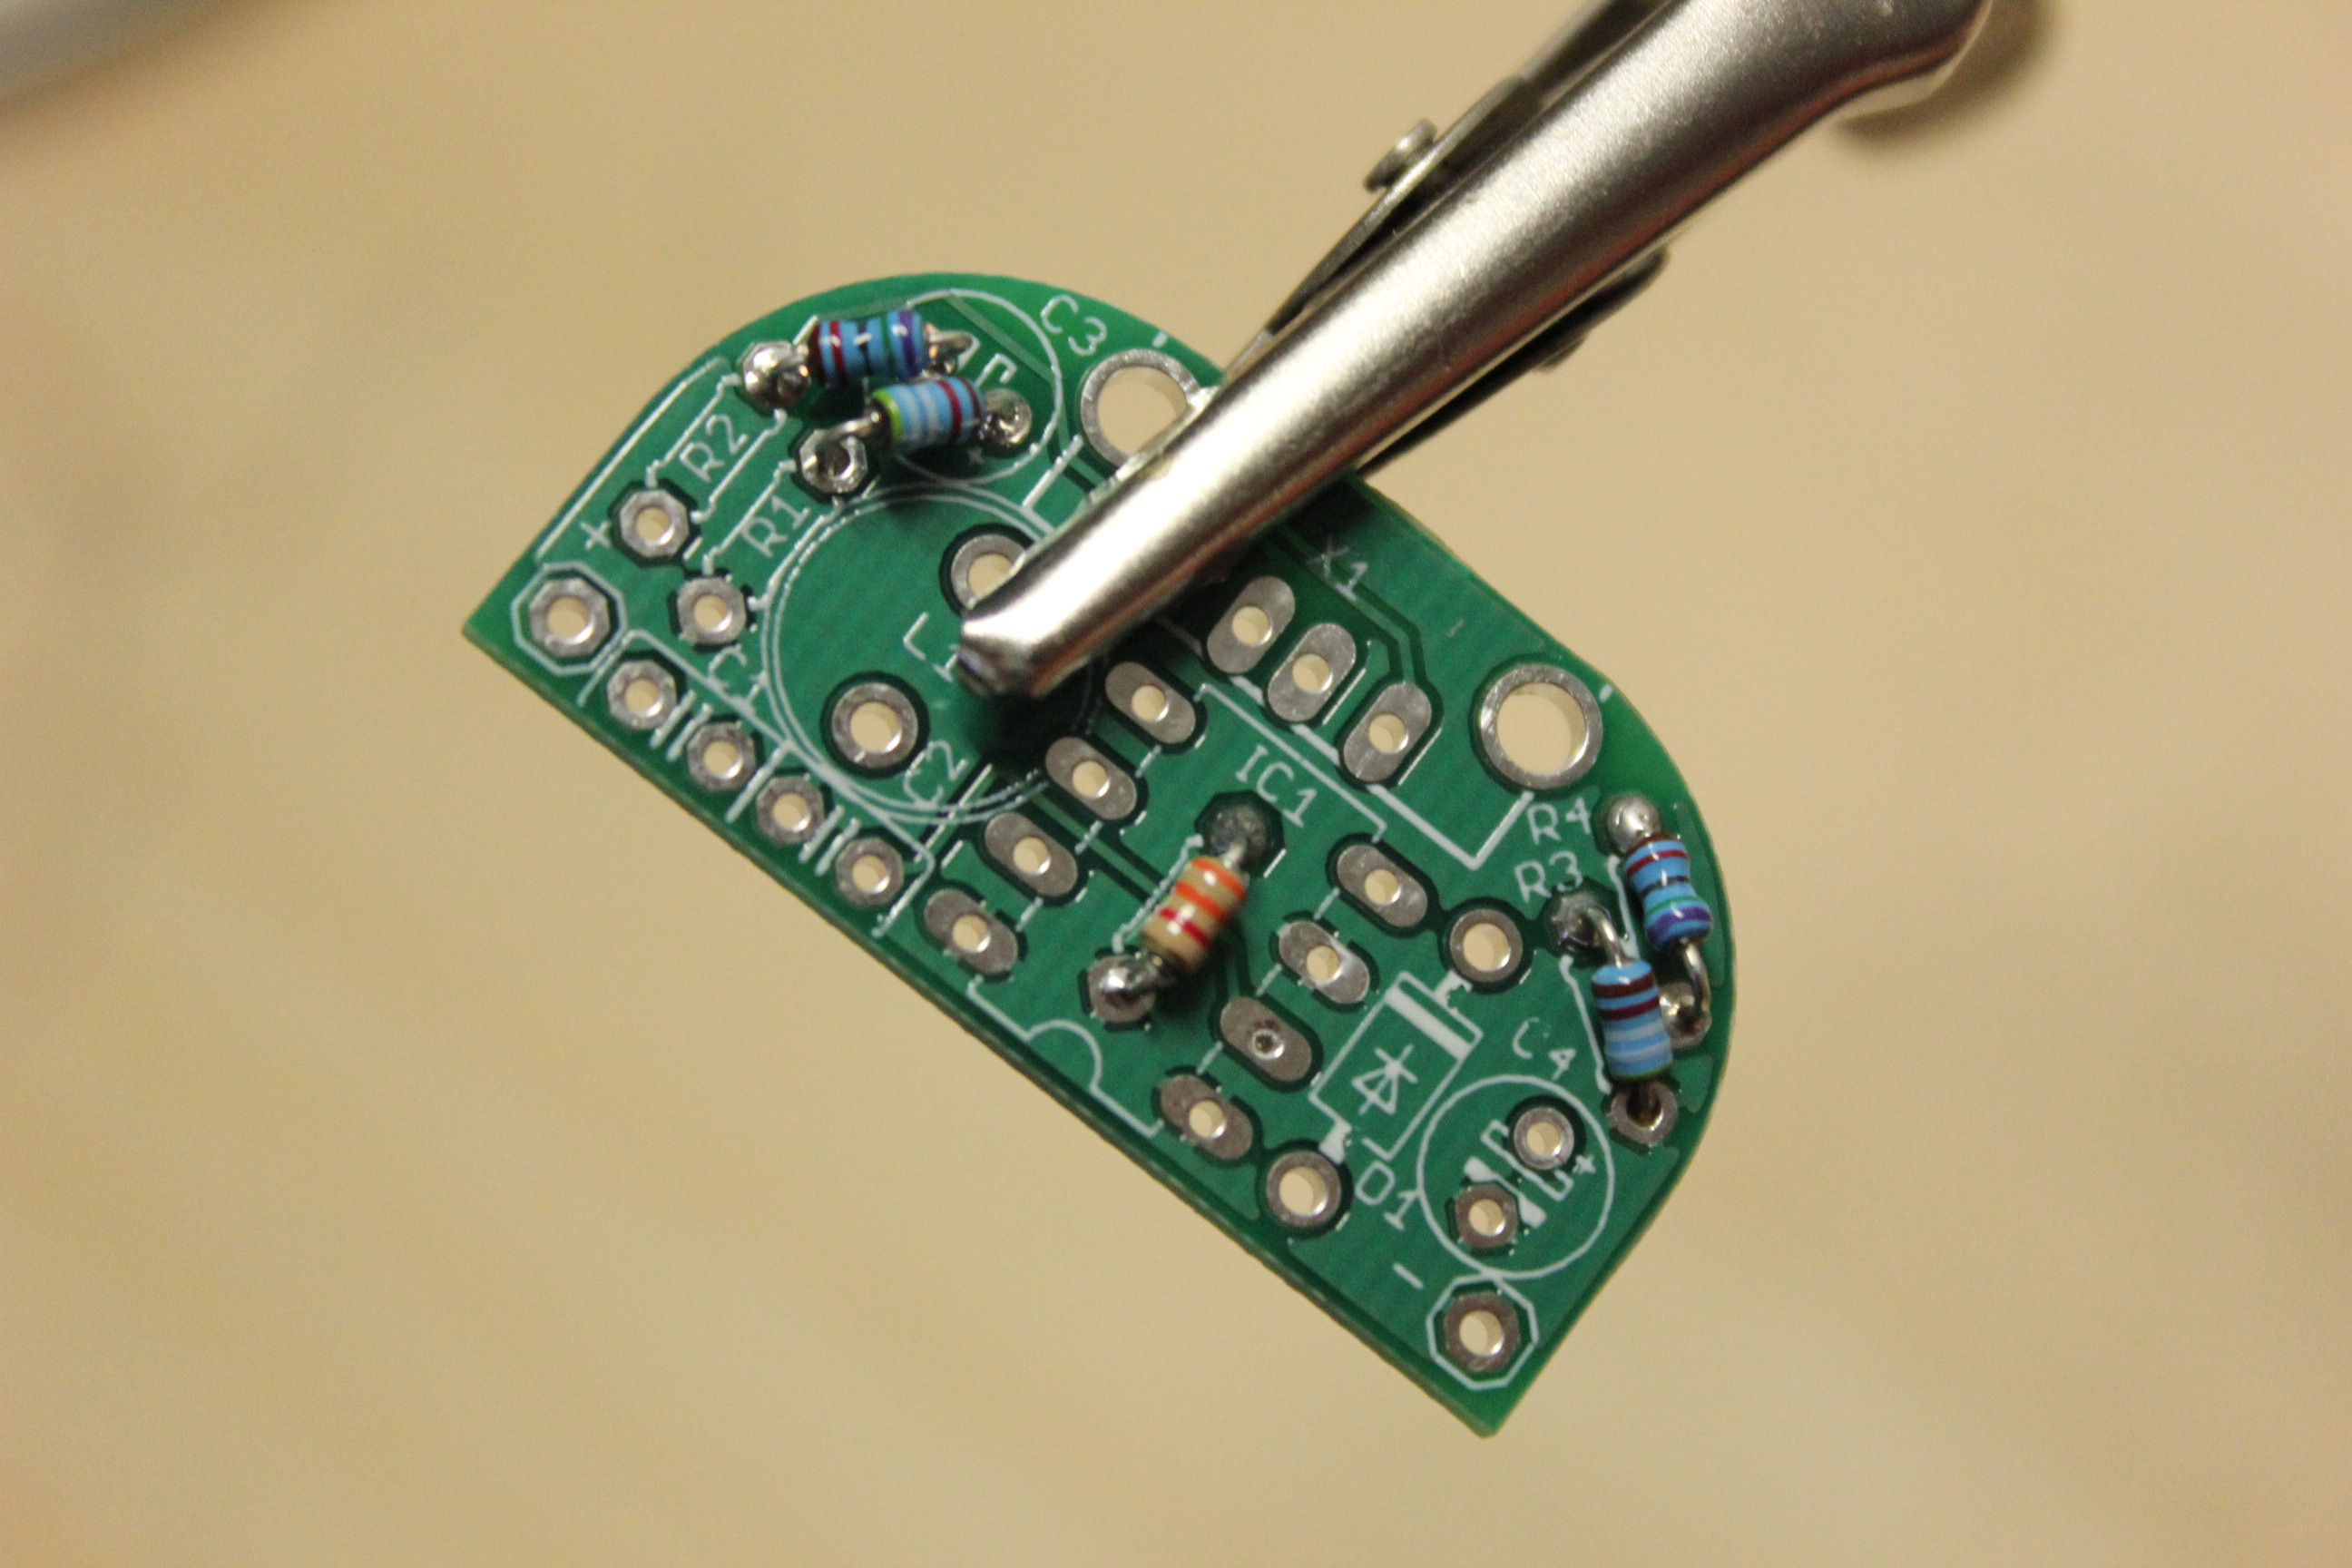
With all the parts gathered, it was time to assemble the MintyBoost. This little green circuit board, first designed way back in 2006, is meant to take in power from batteries or solar panels and "boost" power to the 5V that the iPhone is made to take. When it arrived in the mail, it was just a bunch of loose wires (I learned those were resistors and diodes), a female USB connector, and some padding. So, step one was to solder the resistors to the board.
"I always say that soldering is a three-hand job," Malcolm first told me, as he produced a weird little holding device. "And this, is called a ‘third hand.’"
In front of us was a little stand with clips that I could secure my MintyBoost to as I worked on it. Malcolm showed me how to bend the resistor legs down and thread them through the board. Then, carefully, I’d touch the soldering iron to the filaments and, voilà, sleek tin would flow onto the little pads on the board.
It got easier as I worked on it—and I quickly learned what happens when you mis-solder something (hint: you need to remove it). A spool of copper strips was produced, and through a combination of pressing heat to one side, the solder would jump to the copper.
The MintyBoost is alive
Once we’d finished assembling the MintyBoost—following essentially the same soldering steps for the four resistors, one diode, and two capacitors—it was time to wire it up to the LiPoly board.
"Now we have to do the ‘smoke test,’" Malcolm told me. "That basically means, if you see smoke, unplug everything—you’ve done something wrong."
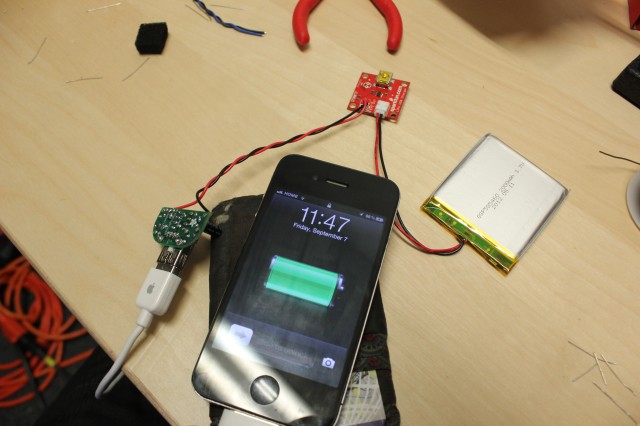
No smoke, no fire, and we were well on our way. It took probably less than a minute to twist the electrical wires and connect all three elements of this setup to each other. Officially, this combination was the MintyBoost connected to the LiPoly, which in turn also connected to the already-charged battery. The moment of truth arrived and—it worked! Eureka! In less than two hours we had successfully created a functioning triad.
But I’d forgotten to get an Altoids tin. OK, it didn't have to be an Altoids tin. But I needed some sort of container to put the three electronic devices (the battery, the LiPoly converter, and the MintyBoost itself) into. So I ran a block down to the nearest liquor store to get an Altoids tin. Once I’d distributed the mints among the co-workers and had washed out the tin container, we needed to fix the cable feeding power out of the solar cell. Malcolm showed me how to take that Micro USB cable and splice it onto the cable coming out of the solar panel, so we could get power from the panel into the LiPoly charger, which would then feed power to the iPhone and to the battery.
And with that, it functioned, solar panel and all. Malcolm put the foam pads onto the two boards so they wouldn’t short in the Altoids tin, made a few cutouts for each port, and we were done.
And for my next trick...
All that’s left now is for me to adhere the boards and the battery to the Altoids tin; then I could easily keep the whole thing in my bag when I’m out and about. I also need to sort out how best to adhere it to my backpack if I want to mimic Martinet accurately; though maybe velcro strips or clasps of some kind will work fine.
So far, I haven’t had a chance to adequately test my MightyMintyBoost and see how many hours I need to leave it plugged in to fully charge my phone. In fact, after the first few days of trying to use the charger on my desk, it didn’t seem like it was fully getting adequate power. Frequently I’d get a "Charging is not supported with this accessory" error message on the phone, or it would alternate between charging and not.
So I rang up Jerome Kelty, a Colorado-based jeweler by trade and the author of that original Instructable. Kelty told me that I should use it primarily outside.
"Small panels like that, they pretty much have to be in direct, outdoor sunlight," he said. "If I have it in my kitchen window, it doesn’t work nearly as well."
He explained that being indoors simply doesn't draw enough power, and that anything blocking the light—windows, trees, shade—diminishes the current. The iPhone is also quite finicky about how much power it draws on its own.
Kelty said that this Instructable continues to get a lot of attention, and people still frequently leave him comments. He addresses every single one. Apparently I’m like a lot of DIY newbies out there.
"The MintyBoost is a great introduction to soldering," he added. "This is an extension of that. Basically all you’re adding is a circuit, but it’s a really good starting point."
Now that I've completed my first project, I feel confident in my abilities to do basic soldering and follow related instructions. I still am not 100 percent clear on what all the elements do, but Malcolm has been very patient with my sometimes inane questions. ("So, a capacitor is different than a resistor, right?")
I guess I'm ready to take my next step into the DIY world. I may not own a soldering iron yet, but I know that the nearest one is just a 10 minute bike ride away. Kelty suggested that for my next project, as a cyclist, I might try to tackle his "Ultimate Night Vision Headlamp"—it’s a cheap, lightweight, and crazy-bright light. This involves not only soldering, but gluing LEDs to an old CPU heat sink. (Coincidentally, I haven't been this excited about gluing since elementary school!)
So take note, Oakland. If you see someone wearing a ridiculous blue lamp on two wheels, you’ve been warned. There's a new, very junior member of the maker movement in the neighborhood.
reader comments
57